728x90
반응형
728x90
반응형
728x90
반응형


solaris는 기본 ftp/telnet package가 설치되어있다.

초기 설치시 root user는 보안상 ftp/telnet이 막혀있다.

일반 user는 상관 없단다...ㅡ.ㅡ;;;

root을 이용해서 ftp/telnet을 사용하여야 한다면,

#vi /etc/ftpd/ftpusers -> 파일을 open하셔서 'root'부분을 주석처리

#vi /etc/default/login -> 파일을 open하셔서 "CONSOLE'부분을 주석처리

728x90
반응형
728x90
반응형

자바 프로젝트에서 데이터베이스를 postgreSQL을 이용하는 경우, JDBC를 새로 받는다.

다운로드 사이트 : [http://jdbc.postgresql.org]

JDBC를 이용하여 데이터베이스에 연결하는 방법 예제...

import java.sql.*;
public class Untitled1 {

  public Untitled1() {
  }

  public void test() {

    try {
      String url = "jdbc:postgresql://localhost/mydb";
      String user = "Administrator";
      String password = "000000";

      Class.forName("org.postgresql.Driver");

      Connection con = DriverManager.getConnection(url, user, password);
      Statement stmt = con.createStatement();
      ResultSet rset = stmt.executeQuery(" select city from weather ");

      System.out.println("결과 ==>> ");

      if(!rset.next()) {
        System.out.println("Nothing!");
      } else {
        String show = rset.getString(1);
        System.out.println("->> "+show);
      }

      if(rset != null) rset.close();
      if(stmt != null) stmt.close();
      if(con != null) con.close();
    } catch(Exception e) {
      System.out.println(e.getMessage());
    }

  }
  public static void main(String[] args)  throws Exception {
    Untitled1 untitled11 = new Untitled1();
    untitled11.test();
  }
}


728x90
반응형
728x90
반응형
지난번 솔라리스10에 postgreSQL을 패키지로 설치를 해보았다..
몇가지 문제가 발생하여 8.3.5 버젼으로 업그레이드도 겸사겸사 해보았다..

일단 지난번에 설치시 모르고 설치했던 몇가지 문제가 있었는데..
솔라리스10은 기본적으로 postgreSQL과 MySQL이 패키지로 설치가 되어있다.

이부분에서 문제가 발생하는것이 아무리 postgreSQL을 8.3.x 버전으로 설치해도 기존 설치된 패키지를 읽어서 8.1.11이 구동된다는 것이다. 

정말로 "pkginfo | grep postgr"을 실행하면 postgreSQL 패키지들이 검색이 된다.
이렇게 검색된 패키지는 "pkgrm [패키지명]" 을 이용하여 먼저 삭제를 하는 것이 좋다.
(8.1.11에 관한 패키지만 삭제하여도 무방한듯...8.2 버전대도 설치가 되어있었는데..이건 뭔지 잘 모르겠다..)

이제 설치를 시작하기위해서 아래 사이트에서 최신 버전을 다운 받자.


다운받은 파일을 압축을 풀자.

#gunzip postgresql-8.3.5.tar.gz

#tar xvf postgresql-8.3.5.tar

그리고 생성된 postgresql-8.3.5 로 이동하여 configure, make, makeinstall을 해준다.

#cd postgresql-8.3.5
#configure --prefix=/usr/local/pgsql
#make
-> All of PostgreSQL successfully made. Ready to install. 메세지가 나오면 성공
#make install
-> PostgreSQL installation complete. 메세지가 나오면 성공

postgreSQL을 관리할 그룹및 유저를 추가해준다. 
단, 그룹추가전에 그룹이 등록되어있는지 먼저 확인후, 없다면 추가해준다.

#groupadd postgres

유저또한, 추가전에 유저가 등록되어있는지 먼저 확인후, 없다면 추가해준다.

#useradd -g postgres -d /usr/local/pgsql -s /bin/bash postgres

다음으로는 인스톨이 성공한 /usr/local/pgsql 폴더의 소유자를 postgres에게 부여한다.

#chown -R postgres:postgres /usr/local/pgsql

postgreSQL에서 data가 만들어질 공간을 만들어주고 이것 역시 postgres에게 소유권을 부여한다.

#cd /usr/local/pgsql
#mkdir data
#chown postgres:postgres data

postgres 계정으로 로그인을 한뒤, PATH 및 lib 경로를 지정해준다.
(난 postgres의 쉘을 bash로 하였다..)

#vi .bash_profile
PATH=/usr/bin:/usr/ucb:/etc:/usr/local/bin:/usr/sbin:/usr/ccs/bin:/usr/local/pgsql/bin:.
LD_LIBRARY_PATH=/usr/local/lib:/usr/lib
JAVA_HOME=/usr/java
CLASSPATH=$JAVA_HOME/lib/tools.jar:$JAVA_HOME/jre/lib/rt.jar
MANPATH=/usr/share/man:/usr/dt/man:/usr/local/man/usr/openwin/share/man:/usr/manexport PATH EDITOR MANPATH LD_LIBRARY_PATH JAVA_HOME CLASSPATH
export POSTGRES_HOME=/usr/local/pgsql
export PGLIB=$POSTGRES_HOME/lib
export PGDATA=$POSTGRES_HOME/data
export MANPATH="$MANPATH":$POSTGRES_HOME/man
export LD_LIBRARY_PATH="$LD_LIBRARY_PATH":$PGLIB

위 내용을 기입하고 저장한다.

그리고 저장한 profile을 적용하여 준다.

#source ~/.bash_profile

이제 DB를 초기화 해보도록 하자~

#cd bin
#initdb -D /usr/local/pgsql/data

Success. You can now start the database server using:
    postgres -D /usr/local/pgsql/data
or
    pg_ctl -D /usr/local/pgsql/data -l logfile start

-> 마지막에 위와같은 메세지가 나오면 성공이다.

DB를 실행하도록 하자~

#postmaster -D /usr/local/pgsql/data/ &

정상적으로 동작하는지 알아보기 위해 postgreSQL로 접속해보도록 한다.

#psql template1


이로써 모든 설치가 완료되었다.

------------------------------ 참고 팁 --------------------------------
* 버전확인
#postmaster --version

* 외부접속 설정
#vi pg_hba.conf
# IPv4 local connections:
host    all         all         127.0.0.1/32          trust
host    all         all         192.168.130.0/24          trust   <--192.168.130.xxx 의 아이피는 접속 허용
host    all         all         192.168.128.0/24          trust   <--192.168.128.xxx 의 아이피는 접속 허용

* 특정 ip만을 접속 할경우
host    all         all         192.168.128.133/32          trust   <--192.168.128.133 의 아이피만 접속 허용

#vi postgresql.conf
#listen_addresses = 'localhost' --> listen_addresses = '*'
#port = 5432 --> port = 5432

윗부분을 찾아서 주석제거후 위 구문으로 고친다.

* database 만들기
#createdb [DB명]

* user 만들기
#createuser [유저명]


728x90
반응형
728x90
반응형

아~ 이거 설정때문에 한참을 고생했다..ㅡ.ㅡ;;

방법은 간단.../usr/local/pgsql/data/pg_hba.conf 에서 다음을 추가해준다.

host       all          all     클라이언트ip /32       trust

그리고 postgresql.conf 파일에서 다음을 수정해준다. (# 주석 제거)

listen_addresses = '*'
port = 5432

자~ 이제 아쿠아로 접속~~!!!!

listen_addresses = '*' <--- 에서 localhost를 *로 바꿔주는 부분은 잘 모르겠는데...혹시 아는 사람 댓글 부탁이요~
728x90
반응형
728x90
반응형

-# 는 root
-$ 는 postgres (매우 중요합니다.)

1)최신소스 받기
ftp://linux.sarang.net/mirror/database/postgresql/
최신버전을 다운받는다. (2000년 3월 24일 현재 7.0.3버전)

2)db-super-user 생성
-#groupadd -g 233 postgres        : 그룹생성
-#useradd -g postgres -d /usr/pgsql postgres : 사용자생성
-#passwd postgres    : password 설정
passwd : *******
passwd : *******

3)압축풀기
-#cd /usr/local/src
-#tar xvf /root/postgres-<버전>.tar.gz
-#cd postgres-<버전>
-#vi INSTALL -->설치문서을 반드시 읽어볼것.
-#cd src


4)환경설정
-#./configure --help
-#./configure --prefix=/usr/local/pgsql
--enable-multibyte=EUC_KR
.....

5)make
-#make COPT=-m486
// 또는 -#gmake COPT=-m486

6)설치
-#make install
// 또는 gmake install
-#cd ../doc
-#make install    // man 설치

7)data-디렉토리 생성
-#mkdir /usr/local/pgsql/data

8)소유권 변경
-#chown -Rf postgres.postgres /usr/local/pgsql

9)postgres 슈퍼유저 작업
-#su - postgres
-$vi .bash_profile  // 다음라인 추가
PATH에 :/usr/local/pgsql/bin 추가
PGLIB=/usr/local/pgsql/lib
PGDATA=/usr/local/pgsql/data
LD_LIBRARY_PATH=/usr/local/pgsql/lib
MANPATH=$MANPATH:/usr/local/pgsql/man

export PGLIB PGDATA MANPATH LD_LIBRARY_PATH
-$source .bash_profile

10)data 생성
-$/usr/local/pgsql/bin/initdb -D /usr/local/pgsql/data
.data - 생성..

11) 데이터베이스구동하기
/usr/local/pgsql/bin/postmaster -D /usr/local/pgsql/data
혹은
/usr/local/pgsql/bin/pg_ctl -D /usr/local/pgsql/data start
-->종료하기는 당근 stop이겠져? :-)

-$createdb test
CREATE TEST....  // test database 생성
-$psql test
  psql=#            // 나오면 정상.
  psql=# q          // exit

12)데몬 설정(부팅시)
-$exit
-#vi /etc/rc.d/rc.local // 다음라인 추가
su - postgres -c "postmaster -i -S -D /usr/local/pgsql/data"

13)계정추가하기
-$cd /usr/local/pgsql/bin
-$createuser ymtech
Shall the new user be allowed to create databases? (y/n) y
Shall the new user be allowed to create more new users?
(y/n) n -->보안상...알져?
CREATE USER
-
14)백업하기
postgreSQL의 모든 데이터는 pgdump을 이용하여 모두 한 파일로
옮길수 있고 다시 그 파일을 이용하여 다른 머신의 postgreSQL에
이식할수 있다. (와우~ 이 얼마나 편리한가?)
당근 이말은 곧 간단한 방법으로 백업이 가능하다는 것이다.
-export하기
$pg_dump [db이름] > [생성목적파일](예를 들어 ymtech.pgdump
라 하자)
                  그럼 잠시후 ymtech.pgdump가 만들어진다.
-import하기
$/usr/local/pgsql/bin/psql -d [DB이름] -f ymtech.pgdump(<--예제)


15)인터넷에서 접근하기
-아파치나 톰캣의 설정은 다른 문서을 참조하세여...
-$cd /usr/local/pgsql/data
-$vi pg_hda.conf
  아이피와 서브넷마스크를 수정한다.
  나의 설정은 아래와 같습니다.
local  all                                  trust
host  all    127.0.0.1    255.255.255.255    trust
host  all    192.168.2.41 255.255.255.0      trust
(여기서 나의 아이피는 192.168.2.41이며 마스크는
255.255.255.0이다)

-여기까지 한후 다시 postgreSQL을 재구동합니다.
$/usr/local/pgsql/bin/pg_ctl -D /usr/local/pgsql/data stop
$/usr/local/pgsql/bin/pg_ctl -D /usr/local/pgsql/data start
728x90
반응형
728x90
반응형

음... 이 글을 쓰기전에 정말 뻘짓했다..ㅡ.ㅡ;;;

여기 저기서 글을 찾아서 설치를 해봤는데..계속 실패를 거듭하던중...

새로운 사실을 알았다...

바로..솔라리스10은 기본적으로 MySQL이 깔려있다는 것이다..

정말 유용한 사이트...[http://radiocom.kunsan.ac.kr/lecture/start.html]

다른 버젼을 설치 한다고 하면 위 사이트에서 참고를 하기 바란다...

환경 설정말 바꿔주면 되는...ㅡ.ㅡ;;

이거 뭐냐...제길....친절하게 설명서도 존재했다...


[root@Solaris10:/usr/local]# cat /etc/sfw/mysql/README.solaris.mysql
To use mysql a number of post-install procedures need to be made by root.
The following steps are derived from the mysql manual (manual.ps, manual.txt or
manual_toc.html) found in the /usr/sfw/src/mysql/Docs directory.
Initialise the database tables.

# /usr/sfw/bin/mysql_install_db

Create mysql user and group and change data directory group.

# groupadd mysql
# useradd -g mysql mysql
# chgrp -R mysql /var/mysql
# chmod -R 770
# installf SUNWmysqlr /var/mysql d 770 root mysql


MySQL reads configuration files from different places in the following order.

Filename                Purpose
---------               ---------
/etc/my.cnf             Global options

DATADIR/my.cnf          Server-specific options

defaults-extra-file     The file specified with
                        --defaults-extra-file=path

~/.my.cnf               User-specific options

Optionally copy a mysql daemon configuration file to configuration directory.
Note there are other configuration profiles available.
For default solaris installation DATADIR is /var/mysql.

# cp /usr/sfw/share/mysql/my-medium.cnf /var/mysql/my.cnf

Start mysql daemon by hand
# /usr/sfw/sbin/mysqld_safe --user=mysql &

Optionally perform the following steps for automatic start and stop of
mysql daemon at boot and shutdown.

Link boot time start up script from rc3.d and rc[012S].d
# ln /etc/sfw/mysql/mysql.server /etc/rc3.d/S99mysql
# ln /etc/sfw/mysql/mysql.server /etc/rc0.d/K00mysql
# ln /etc/sfw/mysql/mysql.server /etc/rc1.d/K00mysql
# ln /etc/sfw/mysql/mysql.server /etc/rc2.d/K00mysql
# ln /etc/sfw/mysql/mysql.server /etc/rcS.d/K00mysql


위 작업을 하고 reboot 하고 mysql 치면...된다...제길...

완전 뻘진중에 뻘짓이다...
728x90
반응형
728x90
반응형

집에서 솔라리스를 한국어 버젼으로 설치했다..

근데 설치하고 인터넷을 할려고 했는데...인터넷이 안된다...

뭐지..뭐지..???

아무리 생각해봐도 ip문제다...ㅡ.ㅡ;;

회사에서는 고정 ip를 사용하고 집에서는 유동아이피를 사용한다..

고정 ip의 경우 VMware 에서 네트워크 설정을 bridged로 설치했다..

이것은 실제 사용하는 ip를 말하는 것이라 한다. 즉, 컴퓨터(host)에서 사용하는

ip 대역으로 설정을 해야한다...

반대로 NAT로 설정은 유동ip의 경우에 해당한다고 한다.

VMware 메뉴에서 Edit > Virtual Network Settings...

NAT 라는 탭이 보인다. 그걸 선택하면 중간에 Gateway IP Address 라는 부분이 있다.

그 옆에 ip가 보인다.

그 ip가 말 그대로 VMware 에서 만든 가상 머신의 게이트 웨이 ip가 된다.

따라서 가상 머신의 ip 는 게이트웨이 보다 높은 숫자를 사용하면 된다.

예를 들어서 Gateway IP Address 가 192.168.228.2 라고 되어 있다면

가상머신의 ip는 192.168.228.3 ~ 192.168.228.254 중에서 맘에 드는 ip 하나를

골라서 가상머신의 ip로 설정하시면 된다.


 혹시 그래도 안된다면...

# vi /etc/resolv.conf

nameserver 168.126.63.1
nameserver 168.126.63.2

으로 한후 재부팅~~~~~
728x90
반응형
728x90
반응형
어제 설치를 어느정도 하고나서, 새로운 난관이 앞에 기다리고 있었다...ㅡ.ㅡ;;

ip가 변경이 된것이다. 다행히 여기에서 같이 일하는 사토야마상이 해결해 줬지만..왠지 그냥 넘어가기에는 찜찜해서 자료를 좀 조사를 했다..


솔라리스는 모든 시스템 의 설정 값들을 /etc 안에 저장하게 된다고 한다.

이중 네트워크 관련 파일은 다음과 같다..

1. /etc/hosts
2. /etc/hostname.fjgi0 혹은 /etc/hostname.hme0
3. /etc/defaultrouter
4. /etc/resolv.conf
5. /etc/nsswitch.conf
6. /etc/inet/netmasks

이들 파일의 설정들을 바꾸어 준 후 재쿠팅을 하면 ip 설정이 변경이된다.

영구히 ip 바꾸기 


1. vi /etc/hosts
127.0.0.1 localhost
xxx.xxx.xxx.xxx 서버이름
 
위와 같이 되어있으며 이곳에 라우터등의 정보를 추가할 수 있다. 즉
 
127.0.0.1 localhost
xxx.xxx.xxx.xxx 서버이름
xxx.xxx.xxx.xxx 라우터이름(정해주면 된다. ip는 사용하고 있는 라우터 ip를 주면 된다.)
xxx.xxx.xxx.xxx 도메인이름(위와 같다)
  
2. vi /etc/defaultrouter
xxx.xxx.xxx.xxx 이렇게 직접 ip를 줘도 되고
라우터이름 <- hosts파일에서 설정한 라우터 이름으로 줘도 된다
 
3. vi /etc/resolv.conf
nameserver xxx.xxx.xxx.xxx 이렇게 직접 ip를 줘도 되고
nameserver 도메인 이름 <- hosts파일에서 설정한 도메인 이름으로 줘도 된다.
 
4. /etc/nsswitch.conf 
# /etc/nsswitch.files: 
# An example file that could be copied over to /etc/nsswitch.conf; it 
# does not use any naming service. 
# \"hosts:\" and \"services:\" in this file are used only if the 
# /etc/netconfig file has a \"-\" for nametoaddr_libs of \"inet\" transports.
passwd: files 
group: files 
hosts: files dns ~~~~~dns라는 말을 추가하여준다. 
ipnodes: files
networks: files 
protocols: files 
rpc: files 
ethers: files 
netmasks: files 
bootparams: files 
publickey: files 
# At present there isn\'t a \'files\' backend for netgroup; the system will 
# figure it out pretty quickly, and won\'t use netgroups at all. 
netgroup: files

5. /etc/inet/netmasks file을 열고 맨밑부분에 netmask값을 넣어준다. 
# The netmasks file associates Internet Protocol (IP) address 
# masks with IP network numbers. 
# network-number netmask 
# The term network-number refers to a number obtained from the Internet Network 
# Information Center. Currently this number is restricted to being a class 
# A, B, or C network number. In the future we should be able to support 
# arbitrary network numbers per the Classless Internet Domain Routing 
# guidelines. 
# Both the network-number and the netmasks are specified in 
# \"decimal dot\" notation, e.g: 
# 128.32.0.0 255.255.255.0 
xxx.xxx.xxx.0 255.255.255.0 
~~~~~~왼쪽은 IP에서 끝자리는 0으로 하고, 오른쪽은 Subnet값을 넣어준다.
  
6 /etc/hostname.hme0 혹은 /etc/hostname.fjgi0 파일에 서버이름을 적어준다.

7 마지막으로 시스템을 리부팅한다.


임시 ip 바꾸기 


임시로 ip를 변경하는 방법을 알아보자 임시로 ip를 설정하면 재부팅 시 그 효과를 잃게 된다.
임시로 변경 ip를 변경해 보자
일단 ifconfig -a의 명령어로 현재 셋팅되어있는 ip를 알아보자

lo0: flags=1000849<UP,LOOPBACK,RUNNING,MULTICAST,IPv4> mtu 8232 index 1
        inet 127.0.0.1 netmask ff000000 
fjgi0: flags=1000843<UP,BROADCAST,RUNNING,MULTICAST,IPv4> mtu 1500 index 2
        inet xxx.xxx.xxx.xxx netmask xxxxxxxx broadcast xxx.xxx.xxx.xxx
        ether 0:b:5d:f3:a2:c6
 
이제 변경해 보자 
ifconfig fjgi0 inet xxx.xxx.xxx.xxx netmask xxx.xxx.xxx.xxx broadcast + up
 
이제 임시로 ip와 netmask가 변경 되었다.
ifconfig -a로 변경 되었는지 확인해 보자
  
서버의 Network cable을 연결할 Port가 남아 있는가?
서버를 봤을 때 4개의 port가 있는데 그 중 3개만 사용할 경우
나머지 하나도 마저 사용하고 싶다면 아래와 같이 한다.
 
# cd /etc
# ls -l hostname*
의 결과가
hostname.hme0
hostname.hme1
hostname.hme2
라면
 
# ifconfig hme3 plumb
# ifconfig hme3 xxx.xxx.xxx.xxx netmask yyy.yyy.yyy.yyy broadcast + up
xxx.xxx.xxx.xxx: 해당 IP를 넣는다
yyy.yyy.yyy.yyy: 해당 Netmask를 넣는다.
설정이 끝나면 확인해 보자
# ifconfig -a
 
현재사용하고 있는 port를 사용하고 싶지 않다면
# ifconfig hme3 down unplumb
 
확인해 보자
# ifconfig -a
  
팁: netstat -rn 명령어로 현재 셋팅되어있는 라우팅 테이블을 확인할 수 있다.


728x90
반응형
728x90
반응형

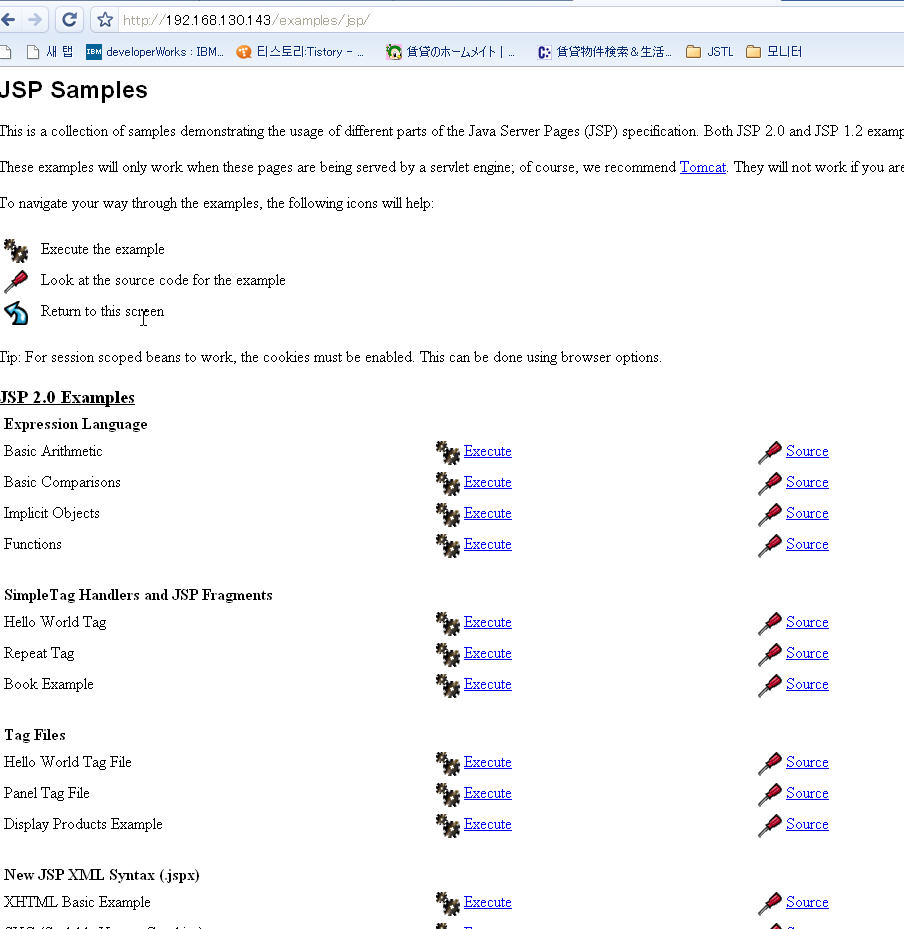
살짝 애를 먹긴했는데...어찌됐던...성공했다...ㅋㅋㅋ

참고로 다음 사이트에 나오는 방법을 보고 따라했다..


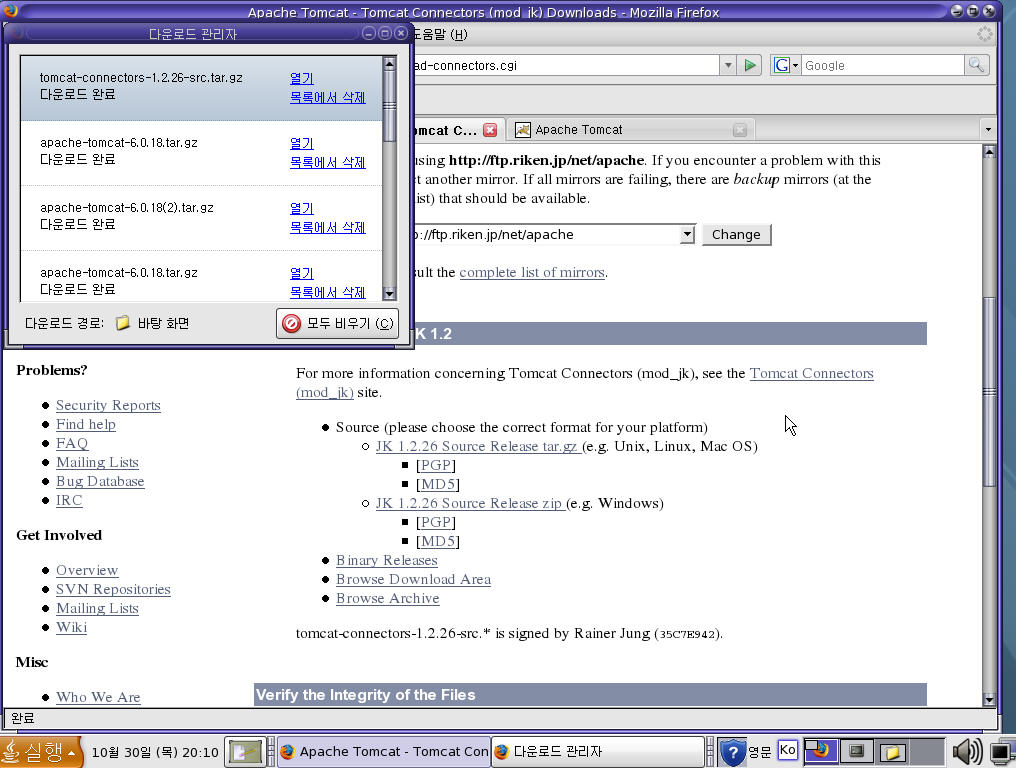
1. JK를 다운 받는다. 


2. gunzip 과 tar 의 압축을 풀어준다.


3. 압축이 풀린 폴더의 native 폴더로 이동한다.


4. 아래 작업을 실행한다.
# configure --with-apxs=/usr/local/apache2/bin/apxs

* 주위 : apache가 구동되고 있으면 안된다.


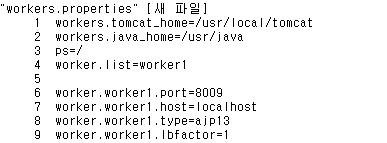
5. 위 작업이 끝났으면 make, make install 을 실한다. 그리고 아파치의 conf 폴더로 이동하여 workers.properties 를 만들어준다.


6. 아래 내용을 작성한다.


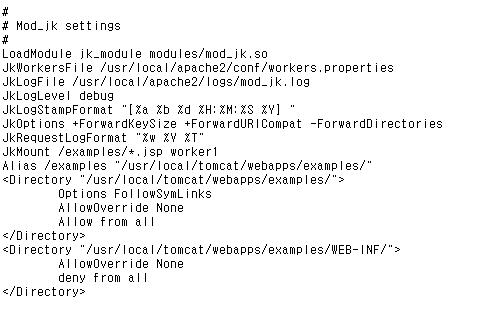
7. httpd.conf 를 열어서 마지막에 아래의 문구를 추가한다.


- 여기에 대한 자세한 설명은 내가 참고한 사이트를 보기 바란다.

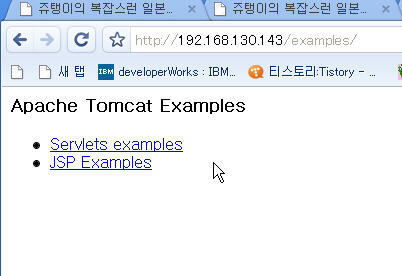
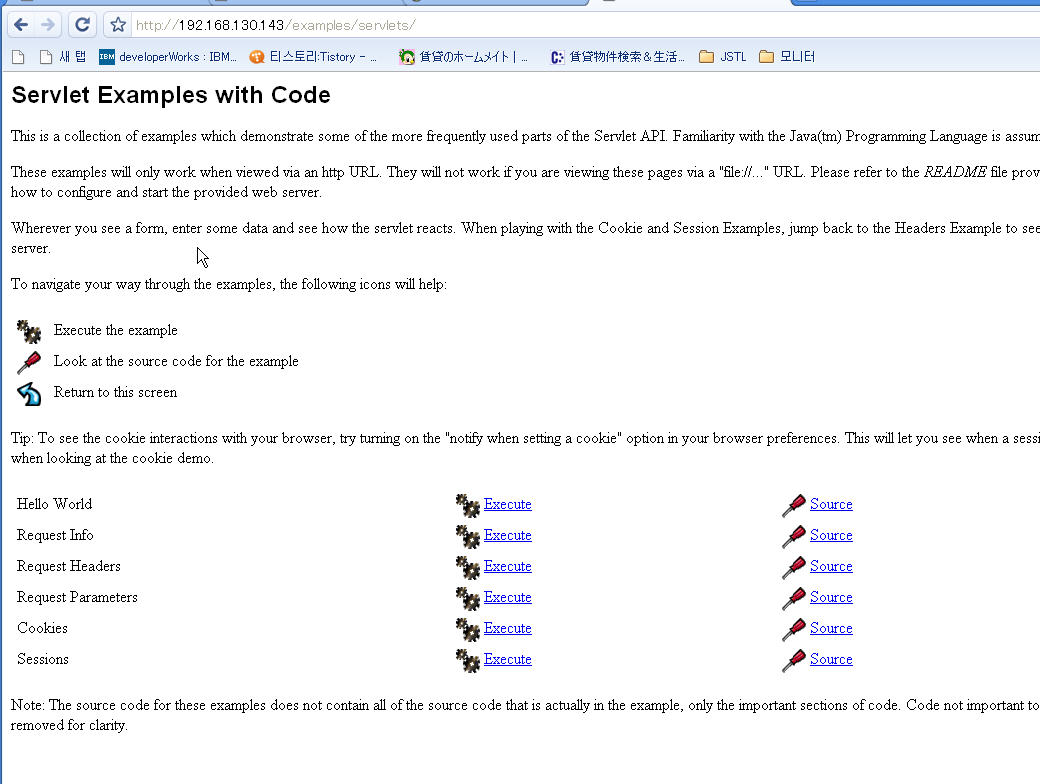
8. 자~ 이제 확인해보자~!!! 


조낸 힘들다...ㅡ.ㅡ;;;
728x90
반응형

+ Recent posts